

We tried to use a vast range of varied examples of new media technologies across all stages of our coursework projects, as it allowed us to enhance the media texts we created.
CONSTRUCTION, RESEARCH AND PLANNING:
To find our track and research already existing artist identities, we used sites such as iTunes, Amazon, Spotify, Soundcloud, Wikipedia and YouTube. We primarily researched similar tracks and artists through YouTube and Spotify, as these sites clearly exhibited similar artists or songs, and this was very beneficial to us in discovering aspects we did not know about already, or had not yet thought of.

 We used Wikipedia to search full discographies, including lesser known songs and collaboration work.
Group communication was very important in discussing aspects such as make up, costume, sets, locations and shoot scheduling. Conveniently we all have access to social media sites through laptops, tablets and smartphones, and so we set up a Facebook group where we could have discussions and post images.

 We also used internet clothing sites such as boohoo.com and missguided.com to purchase items of costume, and originally planned to purchase glitter from ebay.com, until we realised we could buy it much cheaper from Poundland, but with a lesser variety of colours (we only wanted gold, silver and red).
PRODUCTION:
CAMERRRRAAAAA
To light the set we used ARRI Redhead Lights, which were controlled from the lighting desk above the studio. This was quite hard to do, requiring multiple practise sessions, as we had completely different lighting set ups for each genre section of shooting. For our main band shoot, we originally shot onto a projection screen of a glitter background. In watching this footage back we found we did not like this set up, as the lighting facing us was far too bright (as had to light our faces) to be used with a projection screen, and as a result looked very dull and washed out on video. For the re-shoot we decided on a much simpler plain pink backdrop, which worked out very well in the end.

To create this we used the Redhead Lights projected onto a white curtain, and set to a bright pink colour filter.
 For our country shoot we used a mixture of red, orange and yellow lighting to create a sunset style backdrop, as associated with these constructed countryside settings.
 For rap, we used a black background, and only used red and blue coloured lights to light us and the set.
 A black backdrop was also used for our grunge shoot, and plain unfiltered spotlights were used to light our faces.
 Once again a black backdrop was used during our boy band set up, with unfiltered lights lighting our faces. We also had four floor lights situated at the back of the studio, creating a spotlit lighting effect coming from the back of the studio.
We edited our footage using Adobe Premiere Pro.
Here we used a feature called ProCamp to grade our video, and here I have used Camtasia screen capture to show how I used ProCamp to grade. Once applied to a video clip you are able to alter brightness, contrast, hue and saturation, and here I demonstrate these tools by sliding the effects to each extreme of the spectrum before applying the desired effect to my video clip. I then switch between the graded and ungraded shot (by hiding the effects of ProCamp), to show how the grading of the footage impacts the look of the music video.
- For the pop genre, we made it brighter, lighter and more contrasted to enhance the pink and emphasize facial features.
- For country we darkened the footage and raised contrast levels to give more depth to the orange background and stop our faces from looking washed out.
- In the rap section we did not have to do much grading as the red and blue lighting effects already enhanced footage enough without need to brighten or add contrast.
- The grunge section was darkened to make the black seem heavier and more infinite, and to also hide any lighter areas which showed it to be a curtain. We lowered saturation and raised contrast as this is typical of the grunge music video style, as it gave it a far more moody and angry feel.
- Finally, for the boyband section we darkened and raised the contrast, as well as entirely reducing the saturation to leave the video in black and white.

To enhance the TV theme I created a Sky or Virgin styled channel box, which displayed as we flicked between the different TV channels. This showed the time, date, channel name, programme schedule and option buttons.
We used Adobe Photoshop to create our album cover.


We used www.wix.com to create the website for our band. We really likes this program as it allowed us to include a great deal of interactivity on our website, and gave us a lot of freedom in terms of layout, fonts, colours and content. We wanted our marketing strategy to be multi-platform, reaching our target audience on many different levels, so we linked social media sites, and included QR codes which can be scanned to learn more information.


Social Media Marketing:
We created a Facebook and Twitter page for our band, on which we posted official photos and promoted our band. We also posted teaser photos taken during production to gain interest and raise suspense in the run up to our debut single release.


Evaluation:
We used our own social media accounts to create an event to screen all of our year groups music videos, which we all had host access to. After the shoot we used our accounts to post links to our video and survey, hoping that some of our Facebook friends would take the survey. We used our already established online presence to try and gain as many results as possible to analyse for our audience feedback. However, as the survey is anonymous we did receive a few silly results.
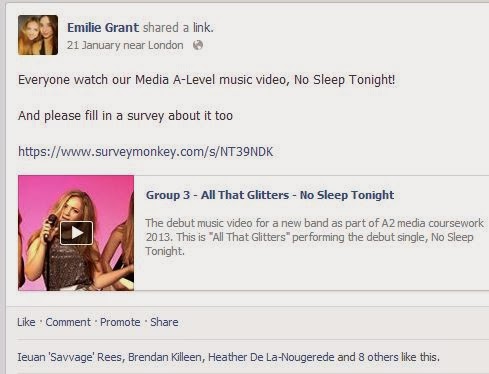


We used surveymonkey.com to create an online survey which was accessible to anyone, and could be accessed by clicking on a shared link. On here we received over 40 responses, which allowed us to build up a quite large and varied picture of our audience responses.

To create the evaluation posts I used the following programmes:

And of course, www.blogger.com to create this blog where I have followed the coursework task from research stages, through to production, and finally in evaluating.
No comments:
Post a Comment